prerequisites
This requires that you have :
- iceoryx that can be built
- Helix QAC 2021.1
- ASCM 2.4.0
- the latest CCT Generator ( can be found here )
Generating a CCT
This step depends on the compiler you use, but in general the command is along the lines of
CCT_Generator.sh -c <compiler command>
with the compiler command being a command used to build an iceoryx file. If you do not know how your project is being built, check build logs.
an example command if you use GCC (command taked from the build log):
CCT_Generator.sh -c /usr/bin/c++ -Diceoryx_hoofs_EXPORTS -I/home/perforce/iceoryx/iceoryx_hoofs/include -I/home/perforce/iceoryx/iceoryx_hoofs/platform/linux/include -O3 -DNDEBUG -fPIC -W -Wall -Wextra -Wuninitialized -Wpedantic -Wstrict-aliasing -Wcast-align -Wno-noexcept-type -Wconversion -std=gnu++14 -o CMakeFiles/iceoryx_hoofs.dir/source/posix_wrapper/unix_domain_socket.cpp.o -c /home/perforce/iceoryx/iceoryx_hoofs/source/posix_wrapper/unix_domain_socket.cpp
the command can be simplified to it's necessary items (we can remove all warning-related flags, source file, output, include and defines for example), but the Generator can take care of the cleaning.
If you have issues using the CCT_Generator, please check the PDF manual supplied with it. Some compilers also require some environment being set (for licensing for example) so make sure that the compiler can be invoked in such a way.
Once you generated the CCT, take note of the CCT's name as we will need it later :
Writing /home/perforce/.config/Perforce/Helix-QAC-2021.1/config/cct/GNU_GCC-c++_9.3.0-x86_64-linux-gnu-C++-c++14.cct
Creating the Helix QAC project
we are going to create an empty Helix QAC project in the iceoryx folder, using default settings and rulesets, but with the previously generated CCT. e.g. :
qacli admin --qaf-project-config -P . --cct GNU_GCC-c++_9.3.0-x86_64-linux-gnu-C++-c++14.cct --rcf default-en_US.rcf --acf default.acf
this will create a prqaproject.xml file and prqa folder.
note that since iceoryx is only C++, we only provide a C++ CCT.
adding iceory files to the Helix QAC Project
this can be done in many ways, but we will go with the most straightforward one : process monitor.
supposing you build with cmake --build build (after having run cmake -Bbuild -Hiceoryx_meta ), you will run the command
qacli sync -P . -t MONITOR -- "cmake --build build"
this will run the build of iceoryx, and helix QAC will catch all files being built.
configuring Helix QAC project for AutoSar
now that the project is created, and files added, the project needs to be configured for autosar analysis. This requires the ASCM module to be installed alongside Helix QAC.
qacli pprops -P . -c rcma-2.3.1 --add
qacli pprops -P . -c ascm-2.4.0 --add
qacli admin -P . --qaf-project-config --rcf ascm-2.4.0-en_US.rcf
the project is now ready for autosar analysis !
running the analysis
simply run the command
qacli analyze -P . -f
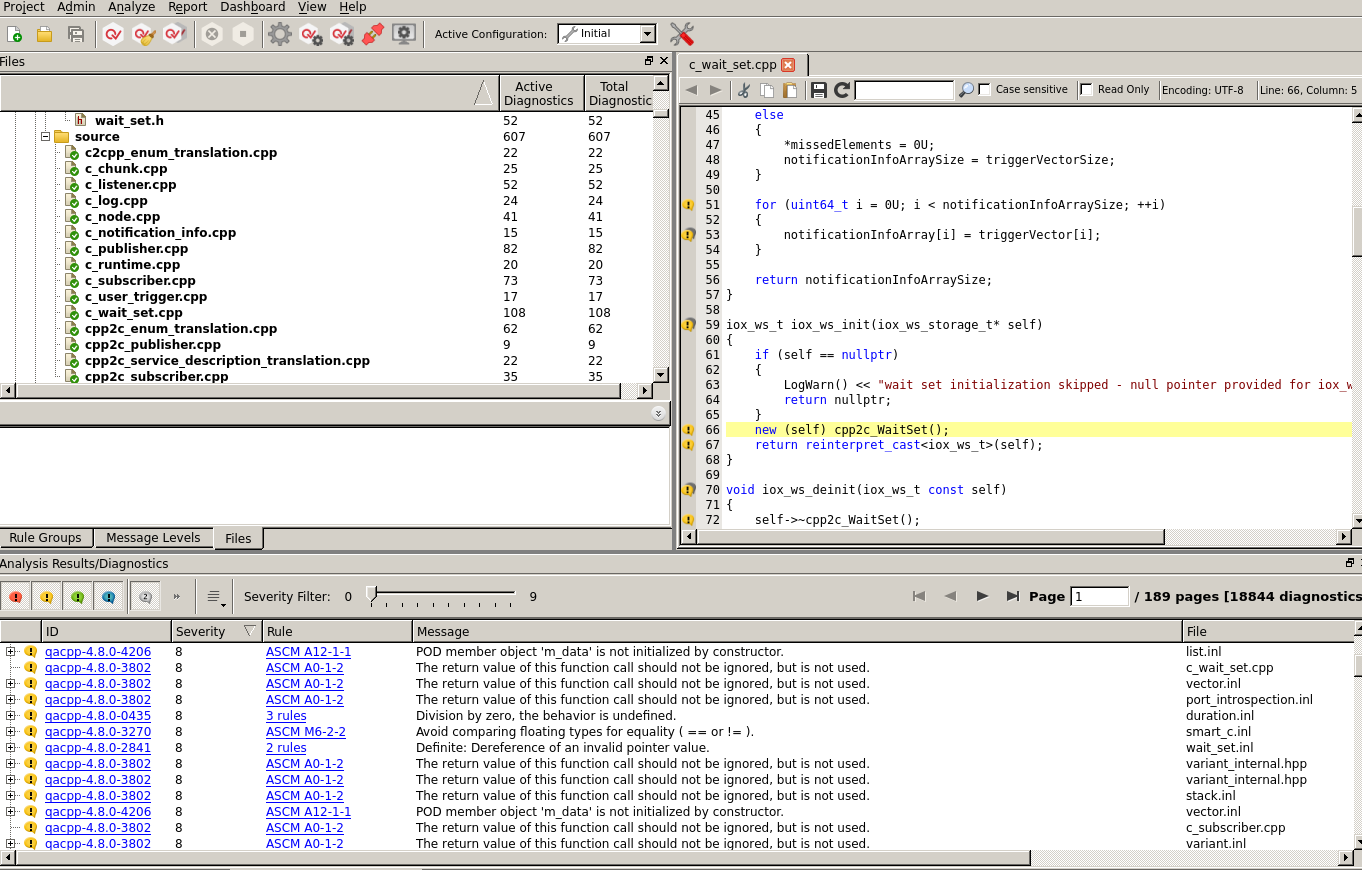
you will then be able to view the results in Helix QAC GUI with
qagui -P . &
Uploading to Dashboard
once you have analysis results, you might want to upload them to a Dashboard instance. Here is a basic command used to upload results to Helix QAC Dashboard. This command may change depending on your network environment (namely username, password and URL) :
qacli upload -q -P . --username USERNAME -p PASSWORD --upload-source ALL -a RELATIVE --upload-project iceoryx -U http://DASHBOARD_IP:8080